
How to Change the Site Margin on your Site

How to Change the Site Margin in Squarespace
Margins control the white space on the left and right sides of your website content. Adjusting them can help your layout feel more open or more compact—depending on your style. Luckily, Squarespace makes it easy to change site margins in just a few clicks.
Here’s how:
1. Enter the Site Styles Panel
From any page on your site:
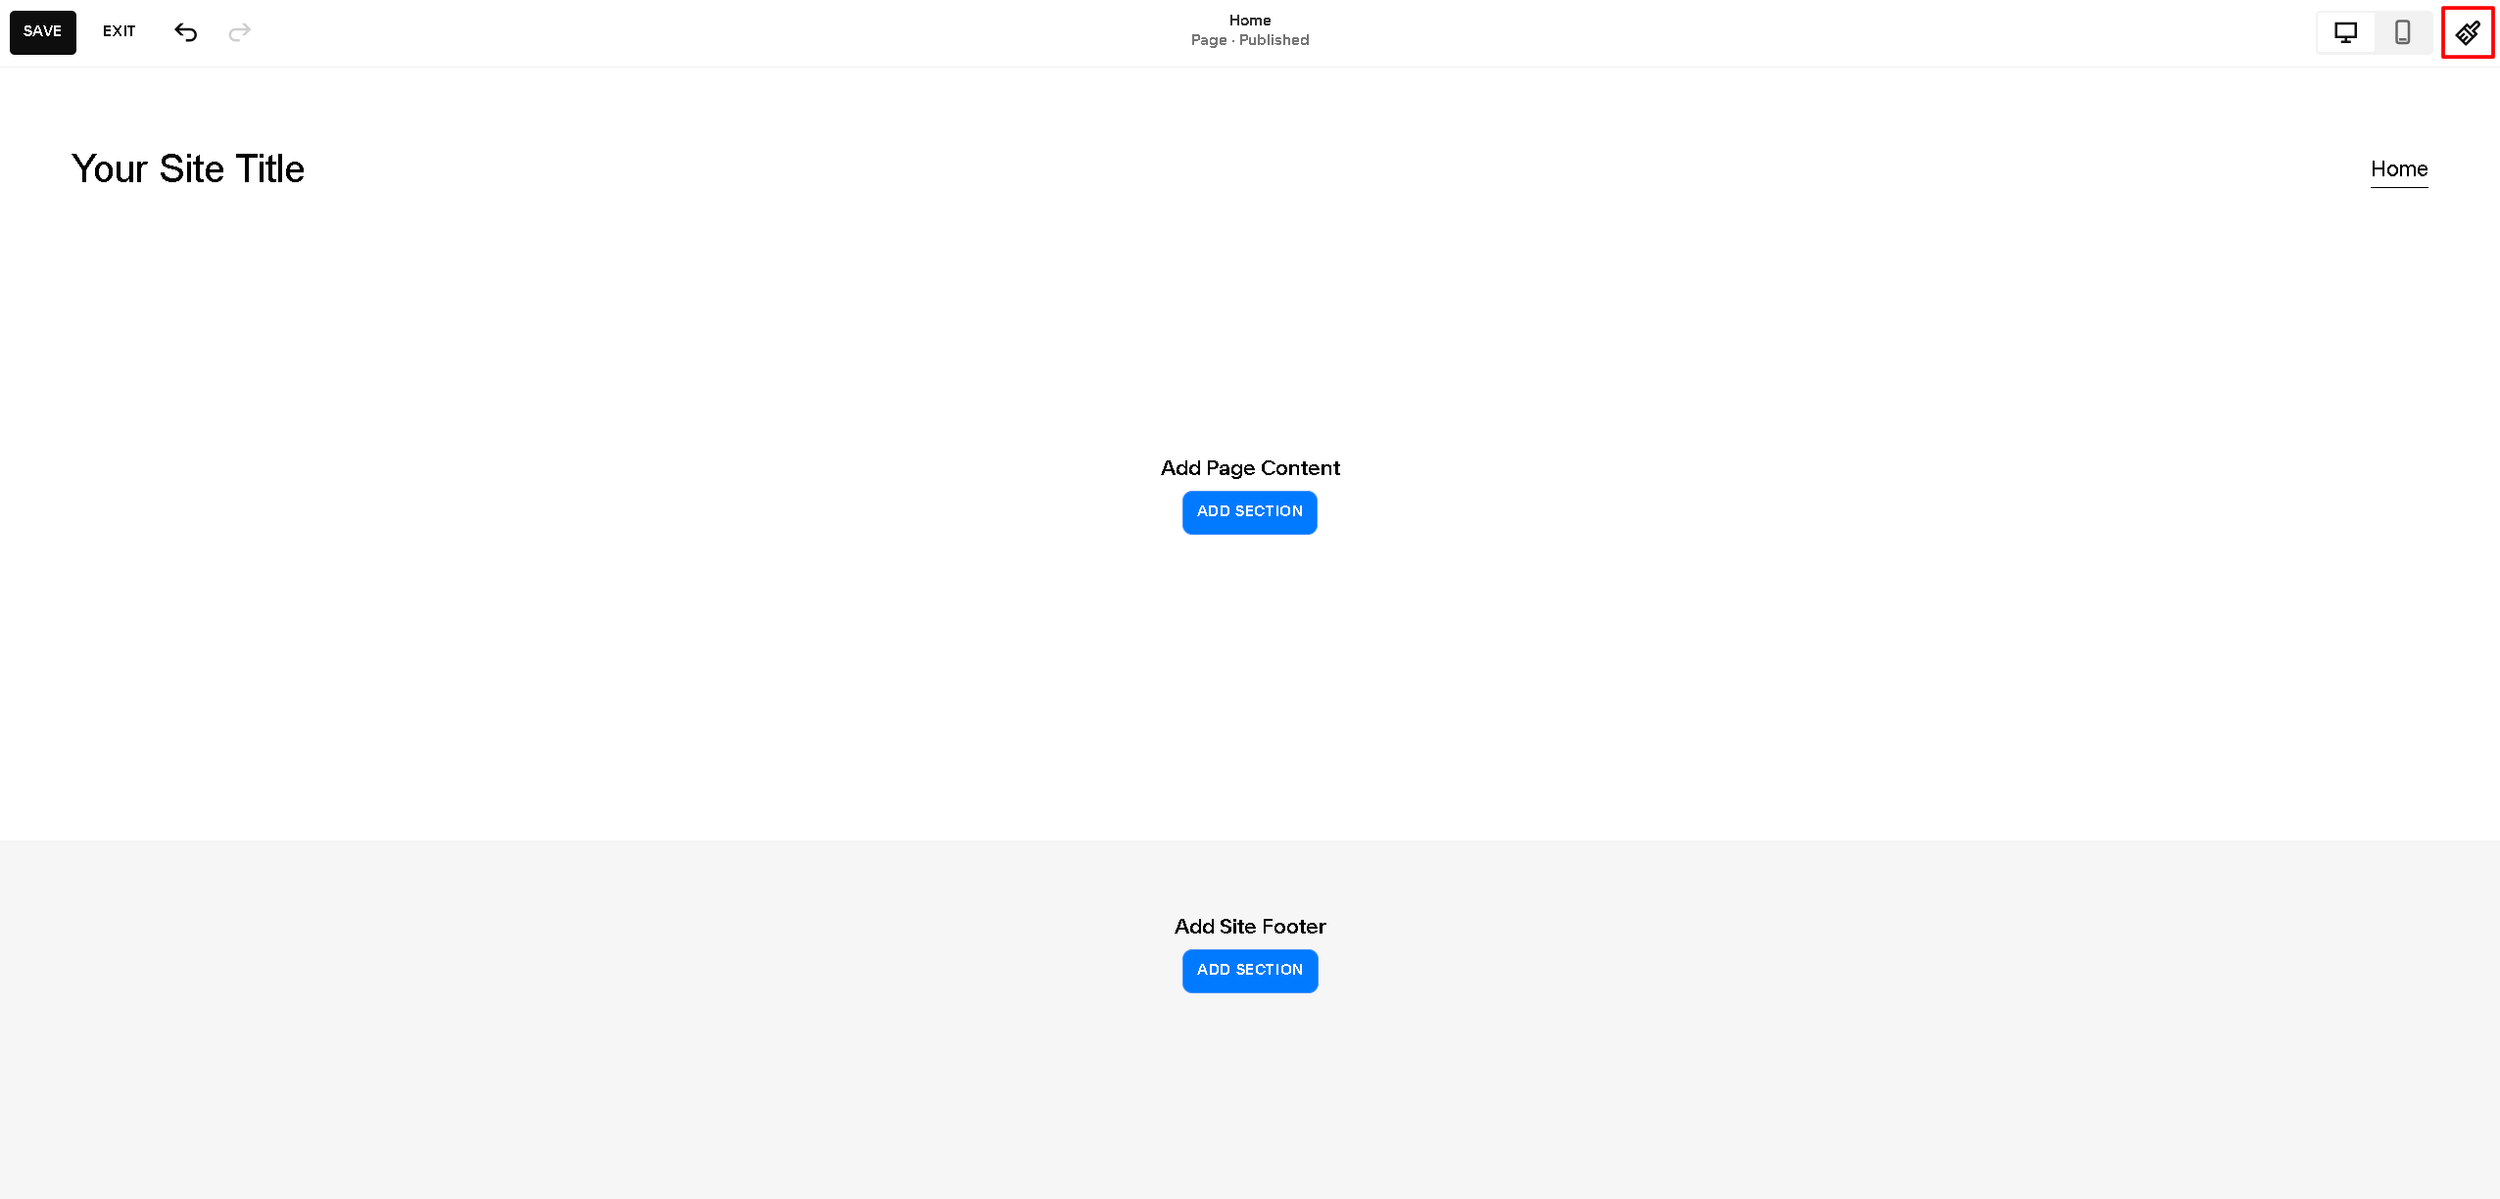
Click Edit at the top of the page.
Then click the paintbrush icon in the top-right corner to open Site Styles.
2. Navigate to “Miscellaneous” Settings
Once inside the Site Styles panel:
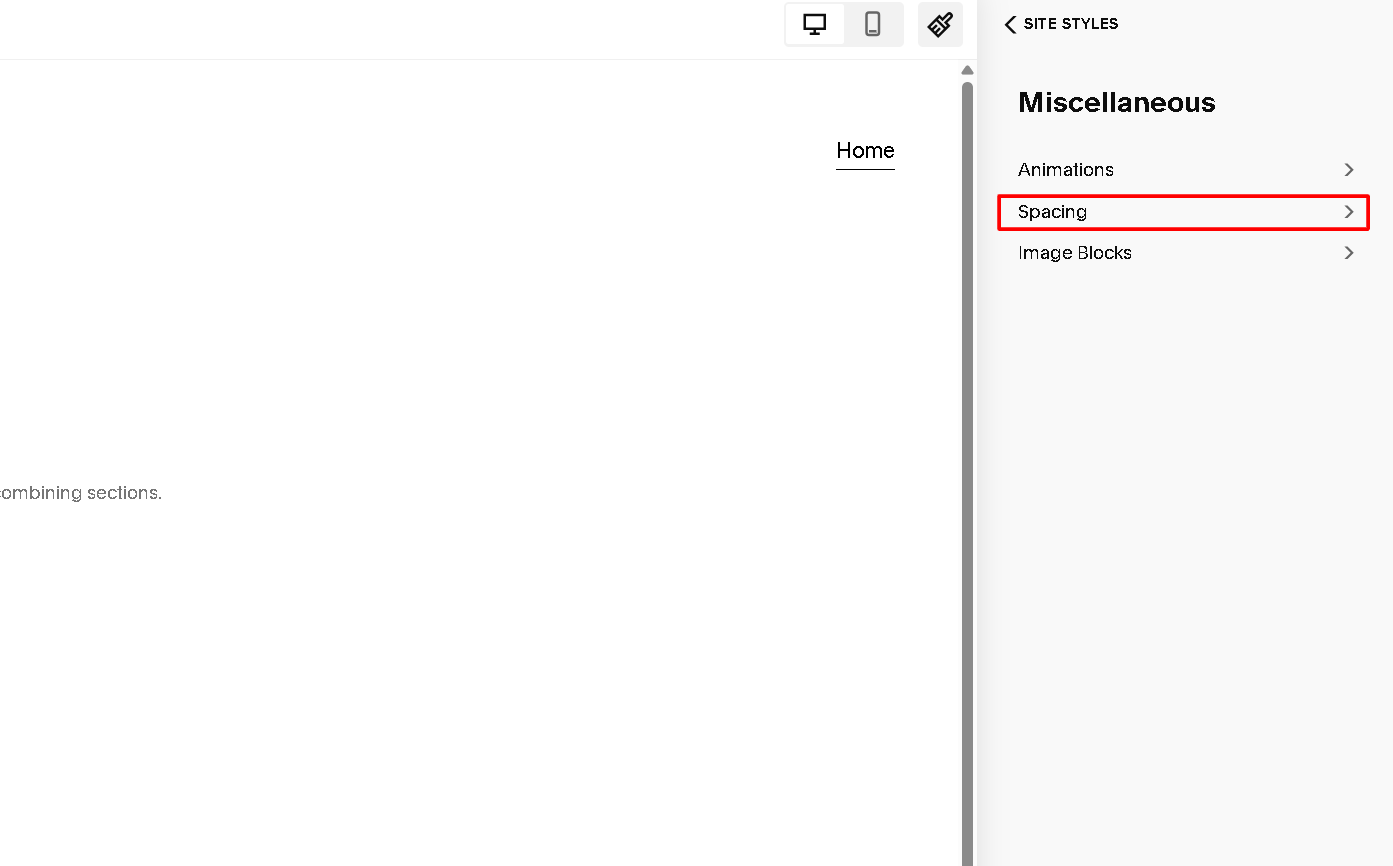
Scroll down to the bottom.
Click on Miscellaneous to access additional layout settings.
3. Select “Spacing”
Under Miscellaneous:
Click on Spacing to access margin and page width settings.
4. Adjust the Site Margin
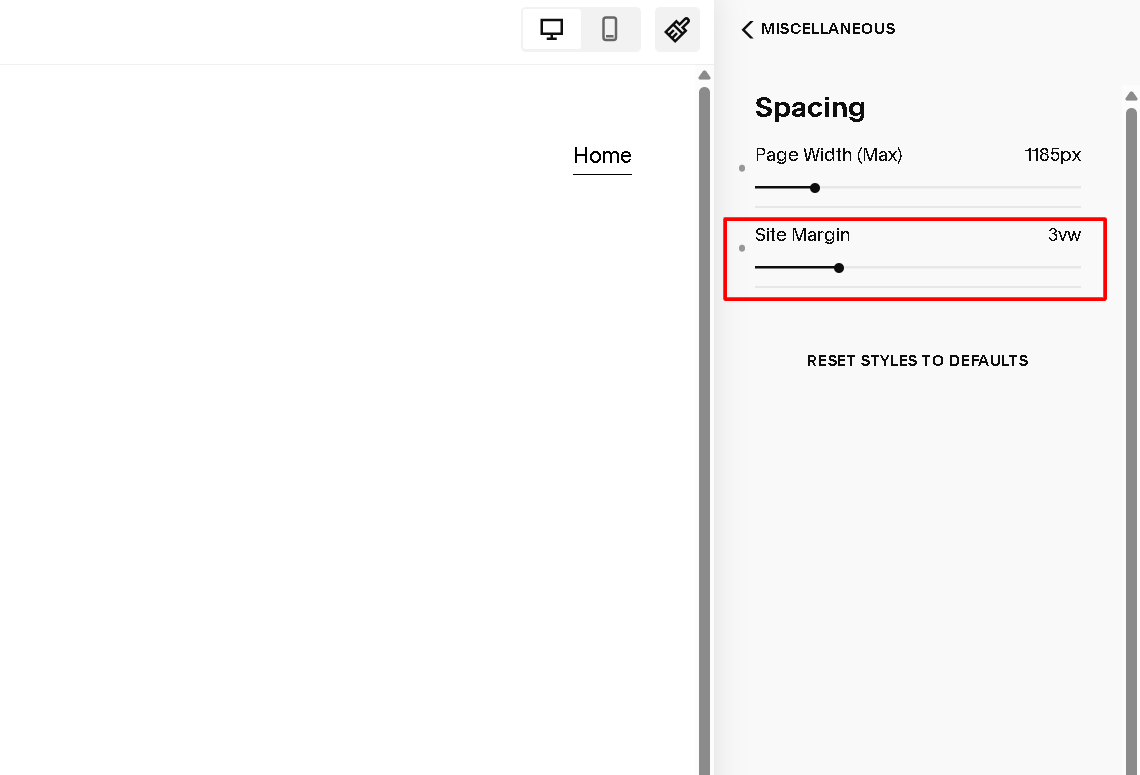
Now you’ll see a slider labeled Site Margin.
Drag the slider left or right to decrease or increase the margin.
The value is in viewport width (vw), so it adjusts responsively with screen size.
For example:
3vw gives you slim margins (more space for content).
6vw adds more white space around your layout.
5. Save and Preview
When you’re happy with the spacing, click Save in the top-left. Then preview your site on both desktop and mobile to ensure your new margin looks good across devices.
Final Tip
Changing the site margin is a subtle way to control how your content feels—whether you want a tight, modern look or a spacious, editorial vibe.
Try it out and see how a small change can make a big visual impact!